Web HostingBudget-friendly shared hosting plans
 Domains SearchFrom .com to unique country domains, explore and register extensions worldwide.
 WordPress HostingPower your blog or business with WordPress hosting.
 Email HostingSimple, secure email hosting that helps you stay connected and professional.
 Reseller HostingStart your own hosting business with easy and reliable reseller hosting plans.
 AffiliateJoin our affiliate program and earn commissions every time you bring in new customers.
 cPanel HostingHosting powered by cPanel, the world’s most user-friendly control panel.
 Windows HostingBuilt for Windows applications and websites
 IN Domain PricesDon’t miss out on the best domain deals in India!
 WHOIS LookupFind out who owns a domain name with a quick and easy WHOIS search.
 .Com DomainGet the most trusted domain for worldwide credibility
 All TldsSearch and register domain extensions worldwide.
 VPS HostingPowerful virtual servers. Full root access. Reliable uptime.
 Managed VPS HostingNot a tech expert? Choose our fully managed VPS service.
 Dedicated ServersTake full power and total control of your own physical server.
Your emails are going to spam. Or worse, someone is sending emails pretending to be you, and your recipients have no way of knowing.
That’s a terrible position to be in, especially if you run a business.
SPF, DKIM, and DMARC exist precisely to solve these problems.
You’ve probably read up on them, and now you’re ready to implement.
This guide will walk you through how to set up each one of them on cPanel.
If you’re not 100% clear on what SPF, DKIM, and DMARC actually are, take a quick detour to this guide, then come back and follow along.
Benefits of Setting Up SPF, DKIM, and DMARC
You already know the benefits of setting up SPF, DKIM, and DMARC; that’s why you’re here.
But if you don’t or need extra motivation to go through the process, here’s a quick reminder of what you stand to gain:
a) Improved email deliverability: Authenticated emails are far less likely to be flagged as spam by receiving mail servers.
b) Protection against email spoofing: These records make it extremely difficult for bad actors to impersonate your domain and send fraudulent emails on your behalf.
c) Increased trust with recipients: When your emails pass authentication checks, inbox providers (Gmail, Outlook, etc.) treat them as legitimate, boosting your sender reputation over time.
d) Threat visibility: Through DMARC reporting, you get visibility into who is sending emails using your domain, including any unauthorized senders you might not know about.
e) Compliance: Many modern email providers and enterprise organizations now require DMARC alignment before they’ll even accept email from you.
Now, let’s get to work.
How To Set Up SPF
An SPF (Sender Policy Framework) record is a DNS TXT record that tells receiving mail servers which IP addresses and mail servers are authorized to send email on behalf of your domain.
Here’s how to add one via cPanel:
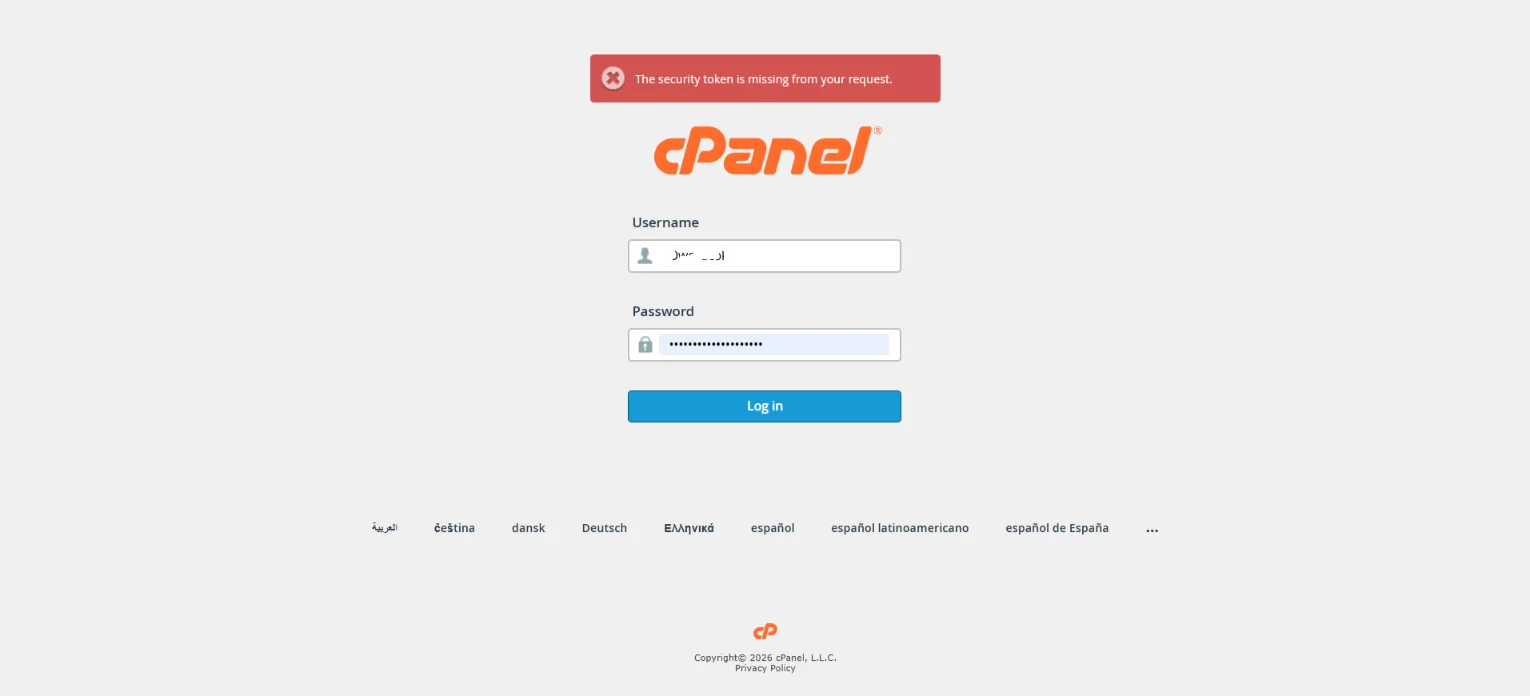
Step 1) Log In to Your cPanel Account
Navigate to your hosting provider’s login page and sign into your cPanel dashboard.
The URL typically looks like yourdomain.com/cpanel or yourdomain.com:2083.
Enter your username and password to access the control panel.
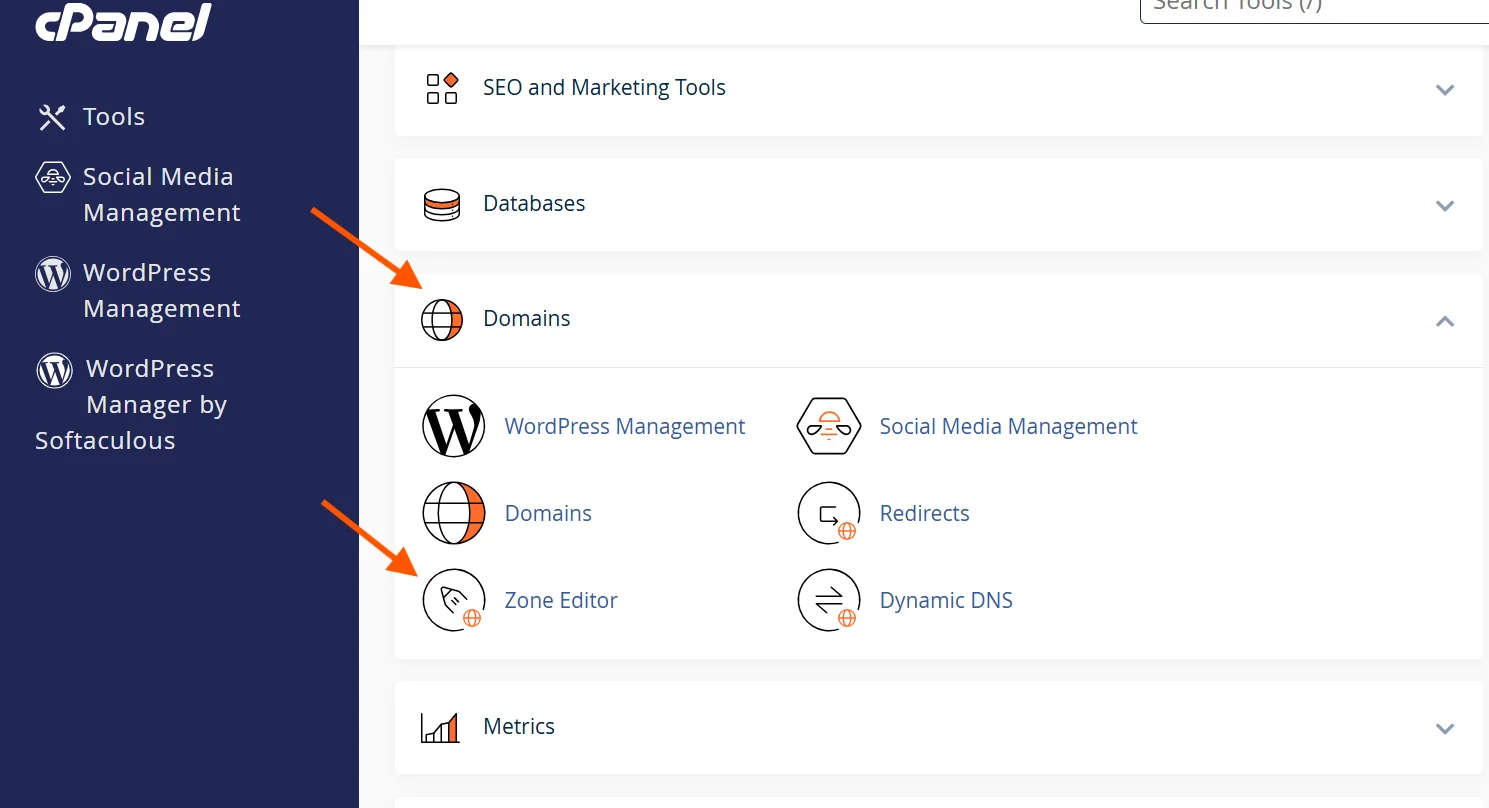
Step 2) Open the Zone Editor
Once inside cPanel, scroll down to the Domains section (or use the search bar at the top).
Click on Zone Editor.
This is where all DNS records for your domain are managed.
Step 3) Access Your Domain’s DNS Records
You’ll see a list of domains associated with your hosting account.
Find the domain you want to configure and click the Manage button next to it.
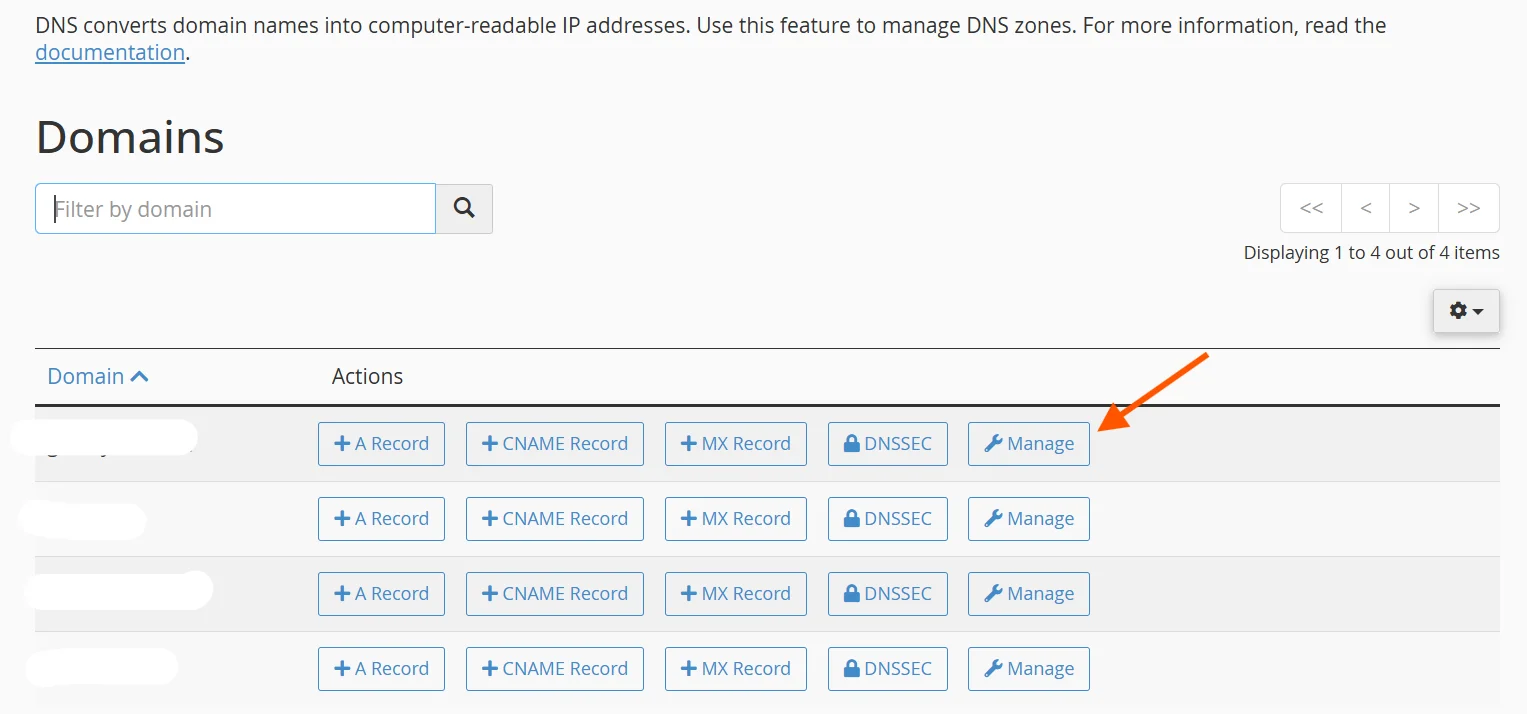
This opens the full DNS record list for that domain.
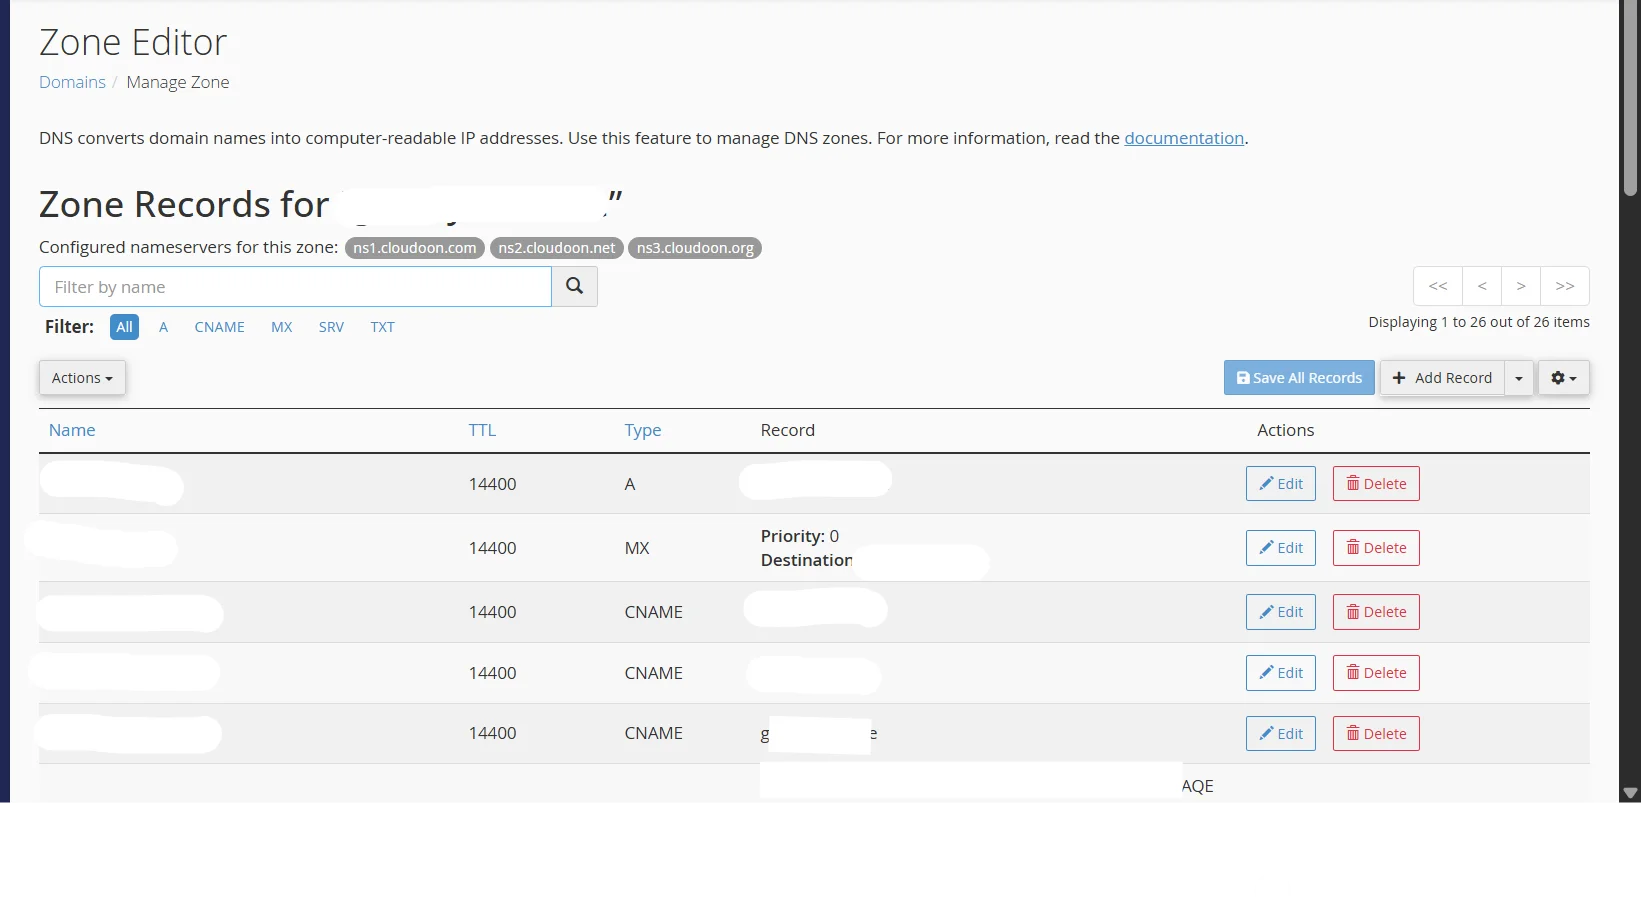
Step 4) Check If an SPF Record Already Exists
Before adding a new SPF record, scroll through your existing TXT records to check whether one already exists.
Look for a TXT record that starts with v=spf1.

Having two SPF records will cause authentication failures, so if one already exists, you’ll need to edit it rather than create a new one.
Step 5) Add a New TXT Record for SPF
Click Add Record at the top.
Then, select TXT as the record type.
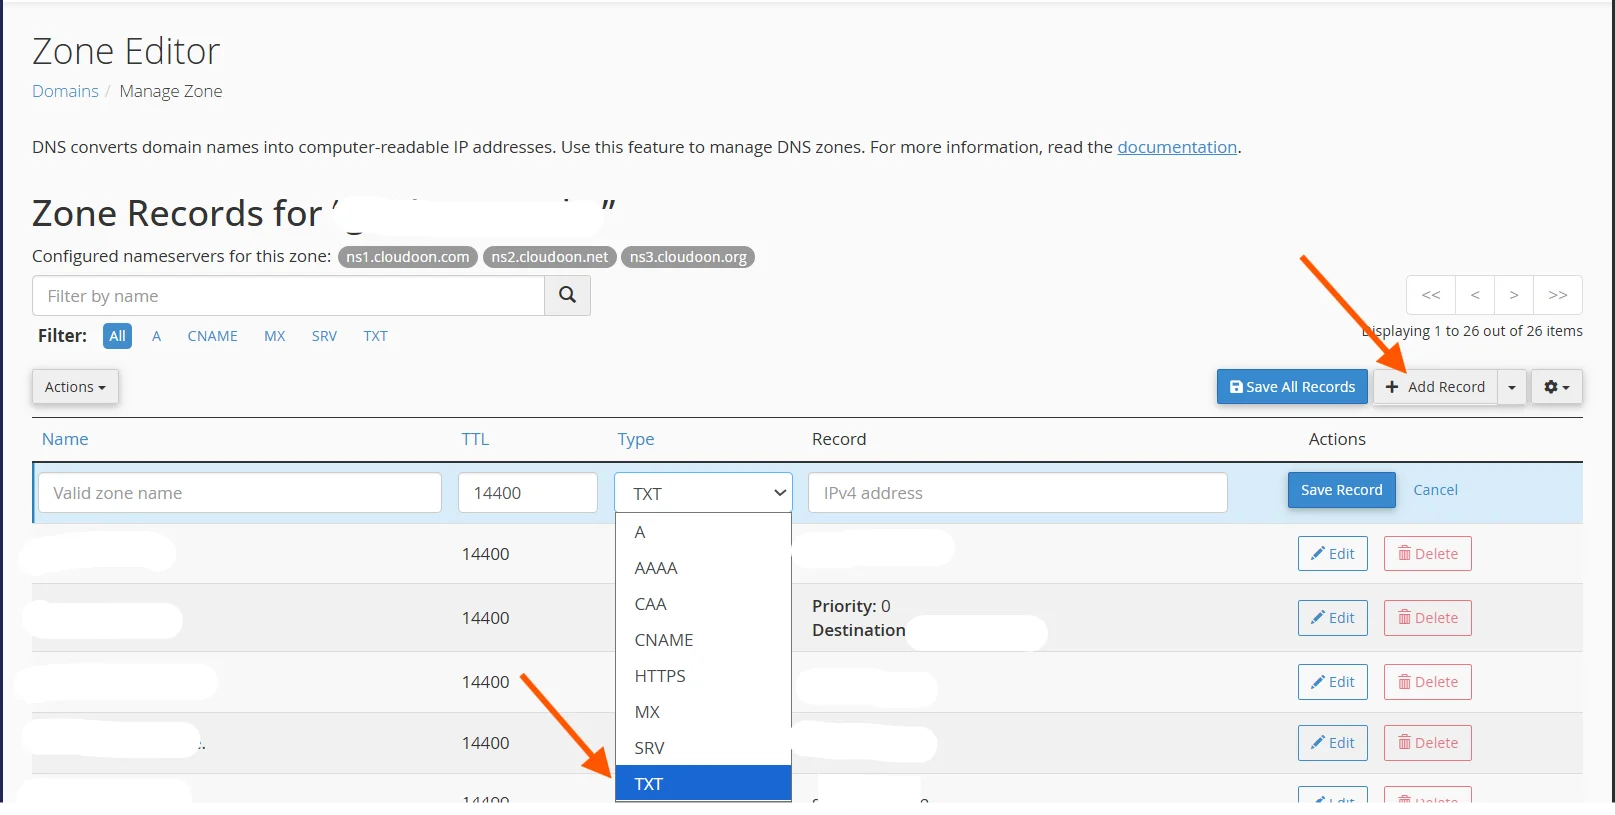
Fill in the fields as follows:
- Name/Host: Enter @ (which represents your root domain) or leave it blank, depending on your cPanel version.
- TTL: Set this to 3600 (one hour) or leave the default value.
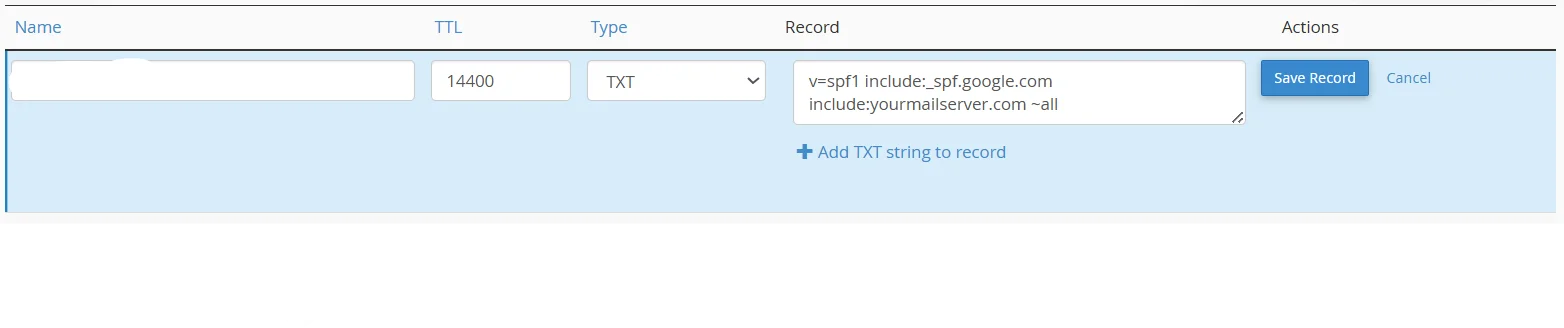
- Value/Record: Enter your SPF record.
A standard example for a domain that sends mail through its hosting server looks like this:
v=spf1 include:yourmailserver.com ~all
If you also send emails through Google Workspace or another third-party provider, include them too:
v=spf1 include:_spf.google.com include:yourmailserver.com ~all
The ~all at the end is a soft fail. It means emails from unlisted servers will be treated with suspicion but not outright rejected. Use -all (hard fail) once you’re confident your SPF record is complete.
Step 6) Save the Record
Click Save Record to apply the changes.
DNS propagation typically takes between a few minutes and 48 hours, though most changes reflect within an hour.
How To Set Up DKIM
DKIM (DomainKeys Identified Mail) adds a digital signature to your outgoing emails. Receiving servers use a public key stored in your DNS to verify that the email genuinely came from your domain and wasn’t altered in transit.
cPanel makes this especially easy because it can generate the keys for you.
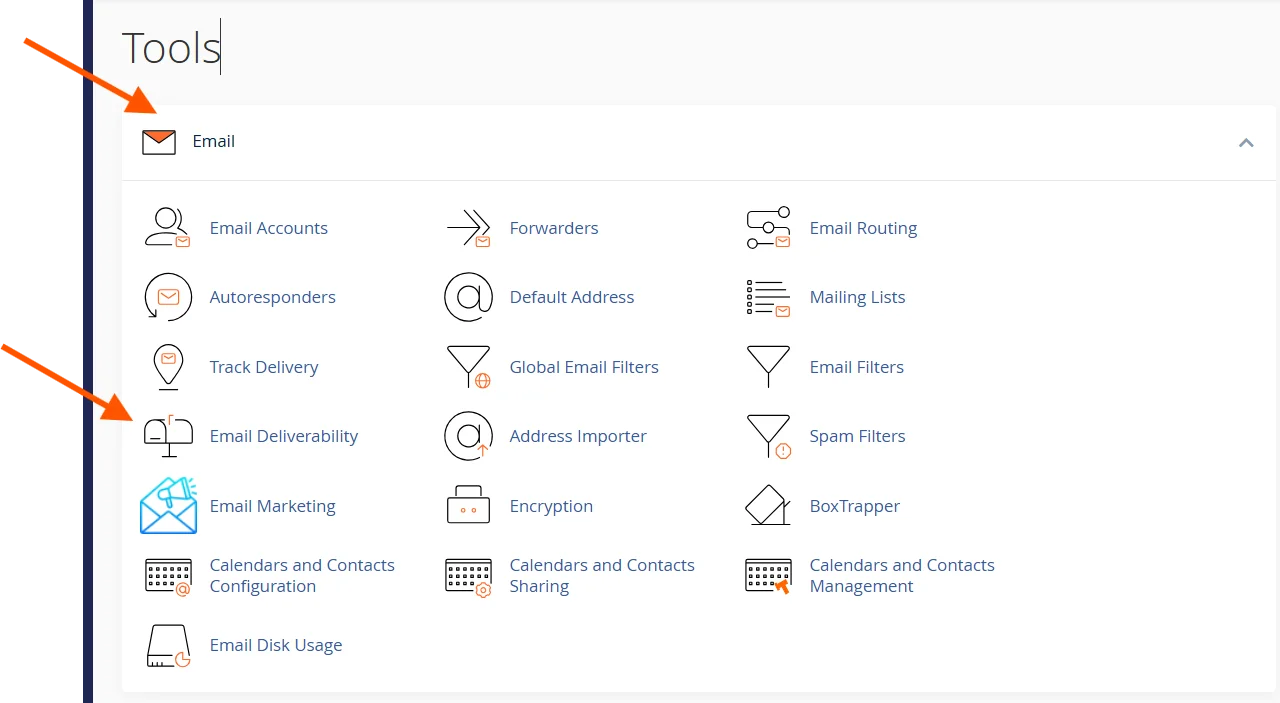
Step 1) Go to the Email Deliverability Section
From your cPanel dashboard, scroll to the Email section and click on Email Deliverability.
Step 2) Find Your Domain
You’ll see a list of your domains.
Next to each domain, cPanel will show the current status of your SPF and DKIM records: either Valid, Invalid, or No Record.
Locate the domain you want to configure.
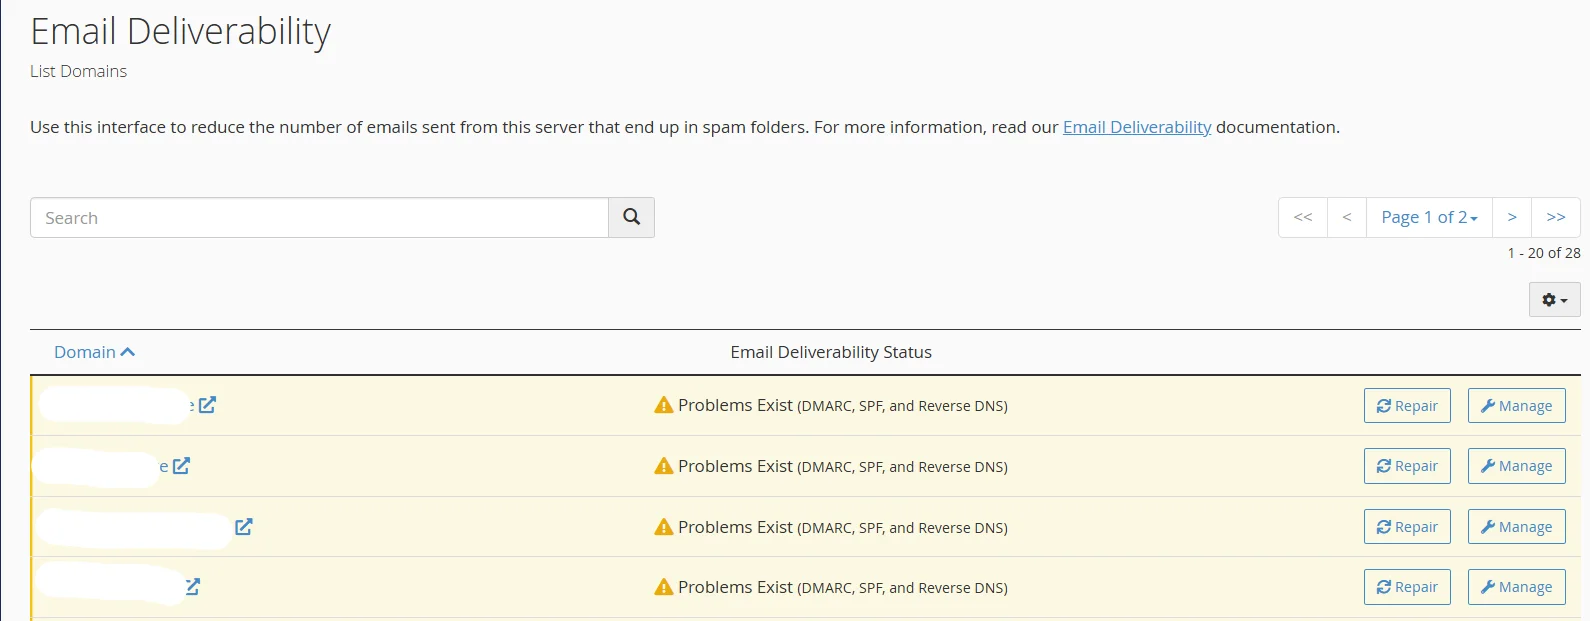
Step 3) Check the DKIM Status
If your DKIM record shows Invalid or Not Installed, click the Manage button next to your domain.
cPanel will display a suggested DKIM record, including the full TXT record value with your public key already generated.
Step 4) Install the DKIM Record Automatically (If Your DNS Is Managed by cPanel)
If your domain’s nameservers point to your hosting provider (meaning cPanel manages your DNS), you’ll see an Install the suggested record button or similar option.

Click it, and cPanel will automatically add the DKIM TXT record to your DNS zone.
This is the fastest and easiest path.
Step 5) Add the DKIM Record Manually (If Using External DNS)
If your domain uses external DNS (Cloudflare, GoDaddy, Namecheap, etc.), you’ll need to add the DKIM record manually.
How to do this:
In the Email Deliverability screen, copy the suggested DKIM record.
It will look something like this:
- Name/Host: default._domainkey.yourdomain.com
- Type: TXT
- Value: v=DKIM1; k=rsa; p=MIGfMA0GCS… (a long string of characters)
Log in to your external DNS provider, navigate to DNS settings, and add a new TXT record using the name and value provided by cPanel.
Step 6) Verify the DKIM Record
Return to the Email Deliverability screen in cPanel and click Check or Verify.
If everything is configured correctly, the status will change to Valid.
You can also use free tools like MXToolbox’s DKIM Lookup to confirm the record is publicly visible.
How To Set Up DMARC
DMARC (Domain-based Message Authentication, Reporting & Conformance) ties SPF and DKIM together.
It tells receiving mail servers what to do when an email fails authentication. It also gives you reports so you can monitor what’s happening with your domain’s email.
DMARC is always added as a DNS TXT record.
Step 1) Open the Zone Editor in cPanel
Navigate back to Zone Editor from your cPanel dashboard (under the Domains section).
Click Manage next to the domain you’re configuring.
Step 2) Add a New TXT Record
Click Add Record and select TXT as the record type. This is where you’ll be adding your DMARC policy.
Step 3) Configure Your DMARC Record
Fill in the record fields as follows:
- Name/Host: _dmarc.yourdomain.com (replace yourdomain.com with your actual domain)
- TTL: 3600
- Value: Your DMARC policy string
For the DMARC policy string, starting with a monitoring-only policy is recommended for beginners.
The string for this is: v=DMARC1; p=none; rua=mailto:[email protected]
Here’s what each tag means:
- v=DMARC1 – Identifies this as a DMARC record.
- p=none – Policy set to none, meaning no action is taken on failing emails. This is ideal if you first want to gather data without disrupting email flow.
- rua=mailto:… – The email address where aggregate DMARC reports will be sent.
Once you’ve reviewed your reports and are confident in your setup, you can gradually tighten the policy:
v=DMARC1; p=quarantine; rua=mailto:[email protected]
And eventually, for maximum protection:
v=DMARC1; p=reject; rua=mailto:[email protected]
To understand what each of these means, you can read this article.
Step 4) Save the Record
Click Add Record to save your DMARC entry.
Allow time for DNS propagation. Once it’s live, you can verify it using MXToolbox’s DMARC Lookup or similar tools.
Step 5) Monitor Your DMARC Reports
As mentioned earlier, DMARC aggregate reports are sent to the email address you specified in the rua tag.
They arrive in XML format, which can be difficult to read raw. Tools like DMARCian, Postmark’s DMARC Digests, or Google Postmaster can parse these reports into a human-readable dashboard.
This will help you identify legitimate vs. unauthorized senders and fine-tune your configuration over time.
Mistakes To Avoid When Setting Up SPF, DKIM, and DMARC
Setting up these protocols can be confusing, especially if you’re new to this. In fact, even technically inclined users make errors.
As such, knowing what to watch out for can save you hours of troubleshooting.
Here are some common errors:
a) Having more than one SPF record
DNS only supports a single SPF TXT record per domain.
If you need to include multiple sending sources, combine them into one record rather than creating separate entries.
For example: v=spf1 include:_spf.google.com include:sendgrid.net ~all.
b) Jumping straight to p=reject in DMARC
It’s tempting to go full protection immediately. But if your SPF or DKIM records aren’t fully aligned yet, a p=reject policy will cause legitimate emails to bounce.
Always start with p=none, review your reports, then move to p=quarantine, and finally p=reject.
c) Forgetting to include all legitimate sending sources in SPF
Every service that sends email on behalf of your domain must be listed in your SPF record.
This includes CRMs, marketing platforms, transactional email services, etc.
Missing even one can cause legitimate emails to fail authentication.
d) Using too many DNS lookups in your SPF record
SPF allows a maximum of 10 DNS lookups.
Using include: statements for multiple services can push you past this limit, causing SPF failures.
Audit your SPF record using tools like Kitterman’s SPF Checker to stay within the limit.
e) Not verifying records after adding them
Always confirm that your SPF, DKIM, and DMARC records are publicly visible and correctly formatted after saving.
A typo in the record value can silently break authentication.
f) Ignoring DMARC reports
Setting up DMARC with p=none and never checking the reports defeats the purpose.
Make a habit of reviewing your reports monthly, especially in the first few weeks after setup.
Send Emails With Confidence Using Truehost Email Hosting
You can set up SPF, DKIM, and DMARC, but without high-quality hosting that natively supports them, you won’t see their full benefit.
That’s where our email hosting comes in. We’ve built our email hosting service to make authentication and deliverability as seamless as possible.
Here’s why our customers trust us with their business email:
- cPanel-based management: Our hosting plans come with full cPanel access, meaning you can manage your DNS records, Zone Editor, and Email Deliverability settings exactly as described in this guide.
- Professional email addresses: Create branded email accounts like [email protected] that build credibility with every message you send.
- Reliable uptime and fast delivery: Our infrastructure is optimized for email performance, so your messages reach inboxes promptly and consistently.
- Built-in security features: Your emails will be protected with anti-DDoS and anti-phishing measures to ensure safe delivery. We use full encryption for stored and sent messages, along with S/MIME for secure communication.
- Affordable plans for every need: Whether you’re a freelancer, a small business, or a growing enterprise, our email hosting plans are priced to deliver value without compromise.
- Access Anywhere: You can stay connected and manage your emails from any device (phone, computer, or tablet.)
- 24/7/3765 Expert support: If you run into any issues configuring SPF, DKIM, or DMARC on your domain, our support team is available to help you get it right. Contact us any day, any time.
Ready to pair your new email authentication setup with hosting that actually supports it? Check out our email hosting plans and get started today.