Web HostingBudget-friendly shared hosting plans
 Domains SearchFrom .com to unique country domains, explore and register extensions worldwide.
 WordPress HostingPower your blog or business with WordPress hosting.
 Email HostingSimple, secure email hosting that helps you stay connected and professional.
 Reseller HostingStart your own hosting business with easy and reliable reseller hosting plans.
 AffiliateJoin our affiliate program and earn commissions every time you bring in new customers.
 cPanel HostingHosting powered by cPanel, the world’s most user-friendly control panel.
 Windows HostingBuilt for Windows applications and websites
 IN Domain PricesDon’t miss out on the best domain deals in India!
 WHOIS LookupFind out who owns a domain name with a quick and easy WHOIS search.
 .Com DomainGet the most trusted domain for worldwide credibility
 All TldsSearch and register domain extensions worldwide.
 VPS HostingPowerful virtual servers. Full root access. Reliable uptime.
 Managed VPS HostingNot a tech expert? Choose our fully managed VPS service.
 Dedicated ServersTake full power and total control of your own physical server.
Getting your first reseller hosting client feels like a big win. That is, until you actually have to set up their account in WHM.
If you’re new to reseller hosting, the process can be overwhelming.
And that’s exactly why this guide exists.
We briefly touched on this process in our How to Set Up Hosting Packages in WHM article. But today, we’re going deep.
We’ll cover every step, every setting, and every option you need to know.
By the end, you’ll be ready to onboard your first client.
Reseller Hosting Packages: What You Need Before Getting Started
Without a reseller hosting package, you’ll end up manually configuring every detail for each client. This is inefficient and prone to mistakes.
So ideally, you should already have at least one package created.
If you haven’t done that yet, go back and set up your packages first. We covered this in detail in our WHM packages guide.
Once that’s done, creating accounts becomes a quick, repeatable process.
Pro tip: Truehost reseller plans come with generous resource allocations, giving you plenty of room to create multiple packages for different client tiers. Explore Truehost reseller hosting plans here.
How to Set Up a New Client Account in WHM
This is the core process you’ll repeat every time you bring on a new client.
Here’s exactly how to do it:
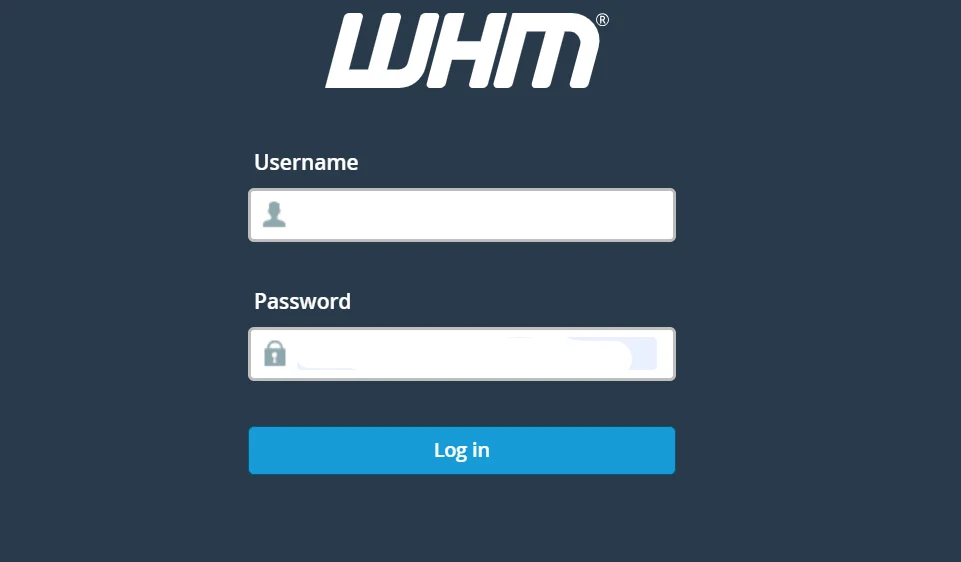
Step 1) Log In to WHM
Open your browser and navigate to your WHM login URL.
This is typically https://your-server-ip:2087 or the WHM URL provided by your hosting provider.
Enter your reseller username and password to access the dashboard.
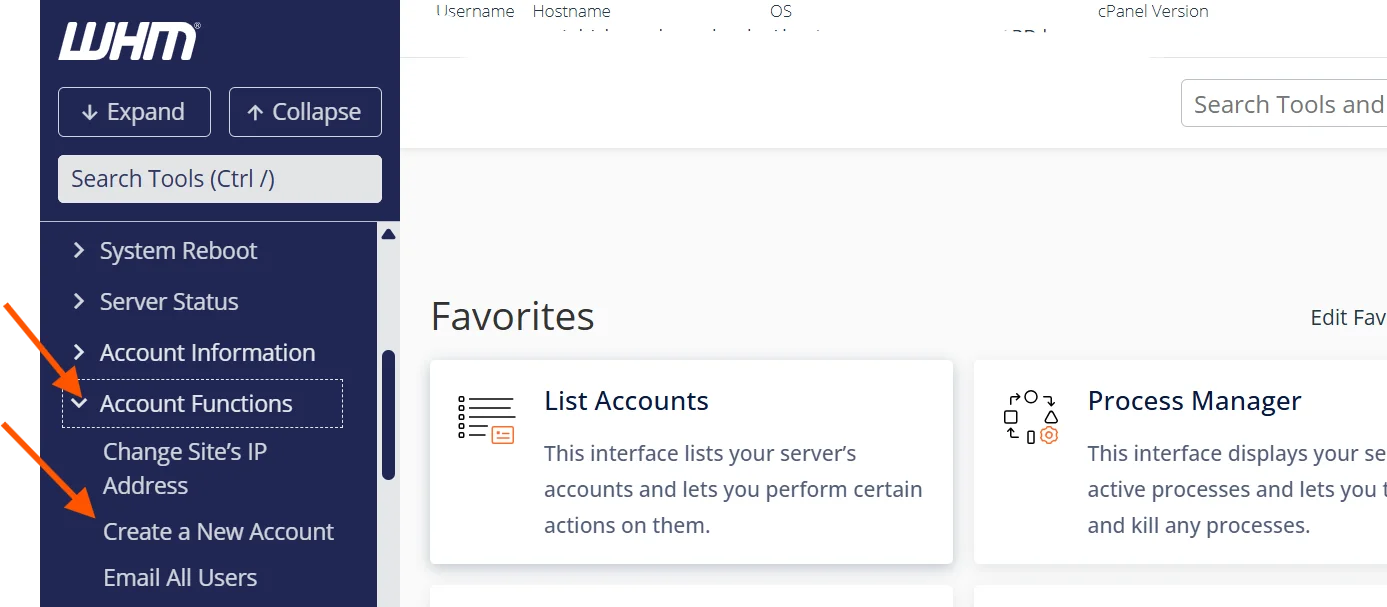
Step 2) Navigate to Create a New Account
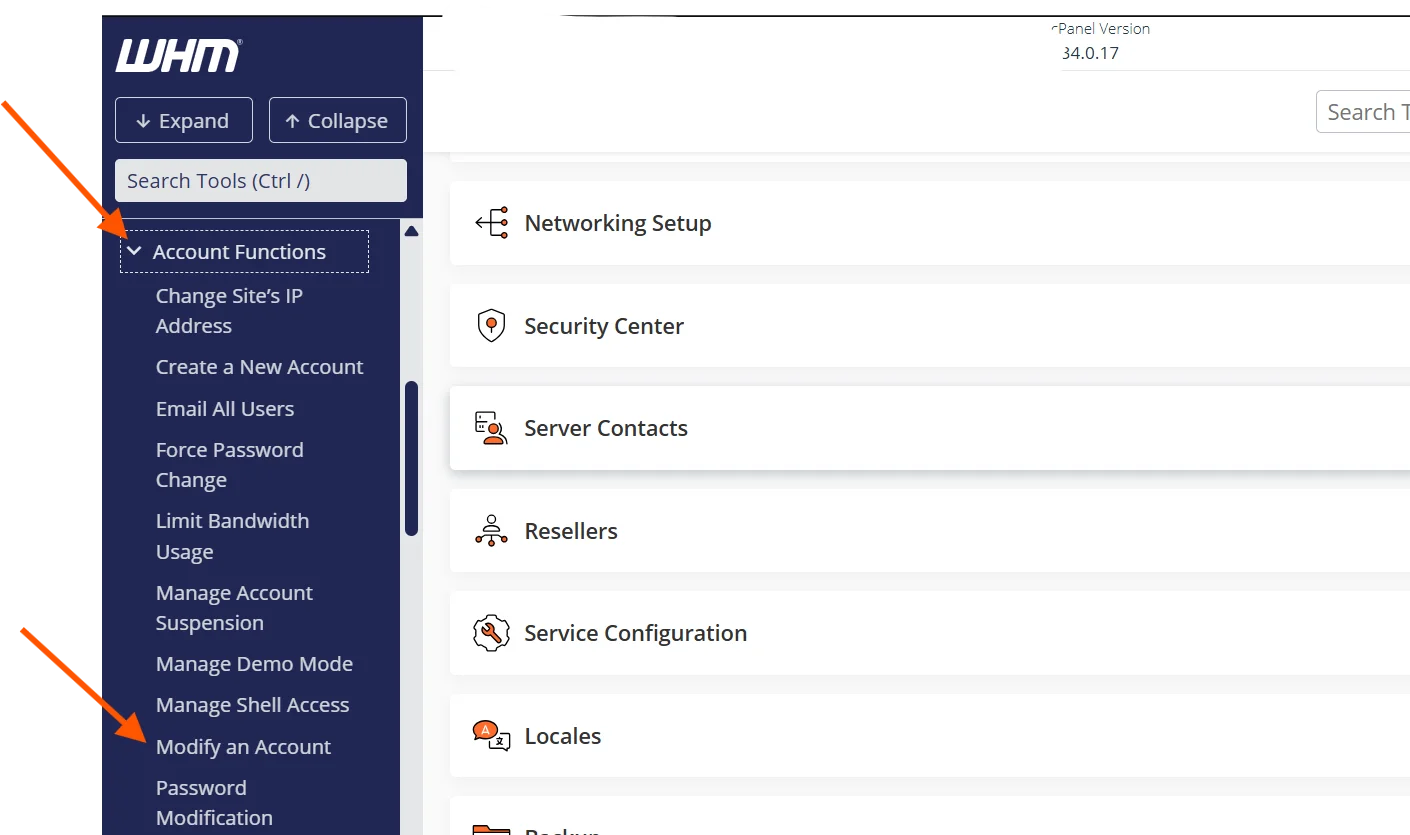
Once inside WHM, look at the left-hand sidebar.
Under the Account Functions section, click Create a New Account.
This opens the account creation form, where you’ll enter all the details for your client’s hosting.
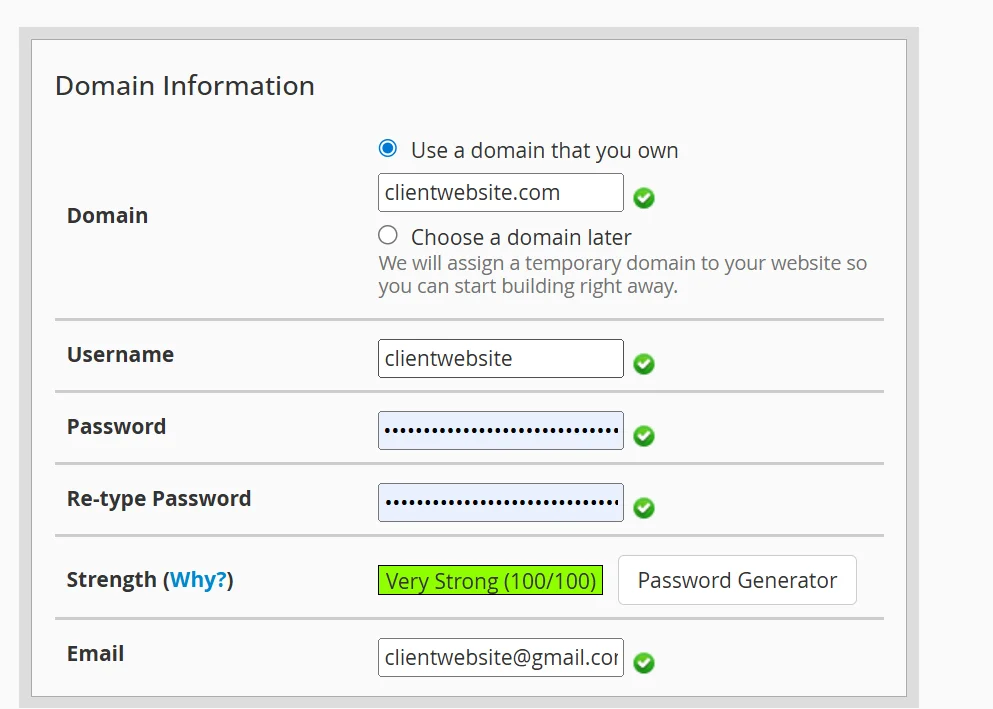
Step 3) Enter Client Information
In this part, you’ll specify:
- Domain – The client’s primary domain name (e.g., clientwebsite.com).
- Username – WHM will auto-generate one based on the domain, but you can customize it.
- Password – Set a strong password for the client’s cPanel access. Use a mix of uppercase letters, numbers, and special characters.
- Email – Enter the client’s contact email address. WHM sends important notifications here.
Step 4) Choose a Package
This is where those pre-built packages pay off.
Simply select the appropriate package from the dropdown menu.
All the resource limits (disk space, bandwidth, email accounts, and databases) will auto-populate based on your package configuration.

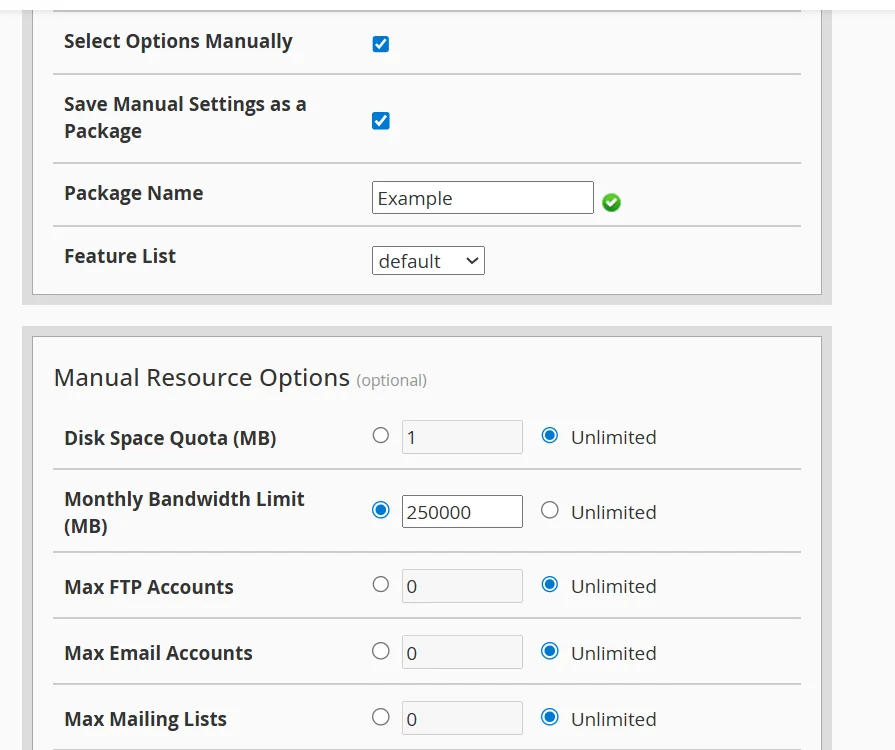
No package? You can configure resources manually, but it’s slower and more error-prone.
Just click the Select Options Manually. The resource options will appear below, and you can fill them in.
Pro Tip: If you plan to use the same resources for another client, click on Save Manual Settings as a Package. This will create a package from the resource settings you select.
Fill in the package name and for the features list:
a) Default – Includes standard cPanel tools like email, file manager, databases, etc. Best option if you want a normal hosting account with full functionality.
b) Email only– This restricts the account to email-related features only. The user can create and manage email accounts, webmail, forwarders, etc.
c) Disabled – This means no features are enabled for the account. Rarely used unless you’re setting up something very restricted or temporary.
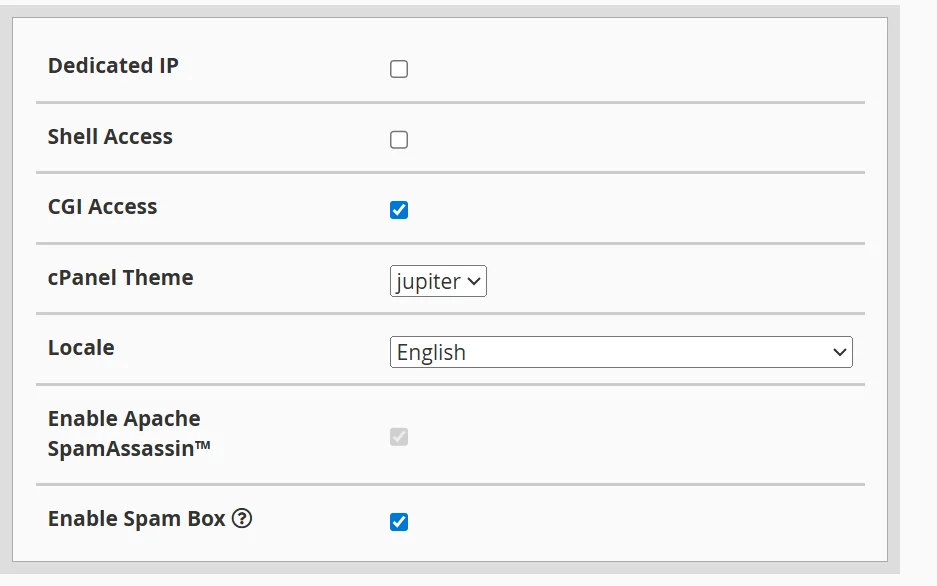
Step 5) Set Account Settings
Here you’ll configure a few additional options:
- cPanel Theme – Usually left as the default (Jupiter).
- Locale – Choose the language for the client’s cPanel interface.
- Enable/Disable CGI Access – Most modern sites don’t need this, but some legacy applications do.
- Enable/Disable SpamAssassin and BoxTrapper – Spam filtering tools for the client’s email.
Step 6) Set Mail Routing
This determines how email is handled for the domain.
You have 4 choices:
- Automatically Detect Configuration – WHM figures out the best routing. This is the recommended option for most cases.
- Local Mail Exchanger — All email is handled by your server.
- Remote Mail Exchanger — Email is handled elsewhere (e.g., Google Workspace or Microsoft 365).
- Backup Mail Exchanger — Your server acts as a backup if the primary mail server is down.
Choose based on whether your client uses server-based email or a third-party provider.

Step 7) Configure DNS Settings
WHM lets you choose how DNS is handled for the new account.
For most reseller setups, the default DNS configuration works perfectly.

To learn how to configure SPF, DKIM, and DMARC, read this article.
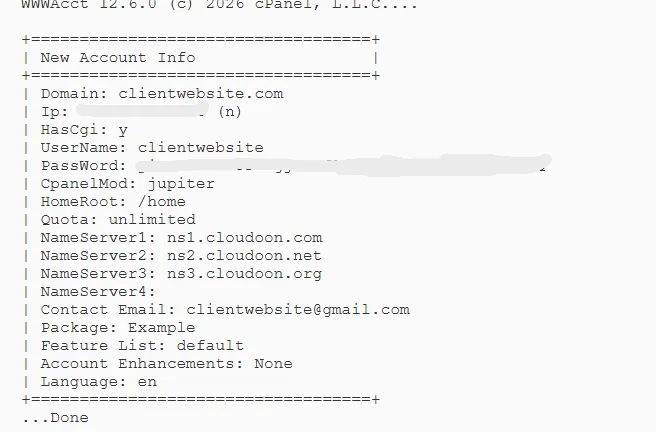
Step 8) Create the Account
Review everything.
When you’re satisfied, click the Create button at the bottom.
WHM will process the request and display a confirmation page with the account details, including the new cPanel login URL and credentials.
That’s it. Your client is live.
How to View and Update Client Information
Managing clients doesn’t end at account creation. You need to handle ongoing account administration.
View all accounts
To view all accounts, go to Account Information, then List Accounts in WHM.
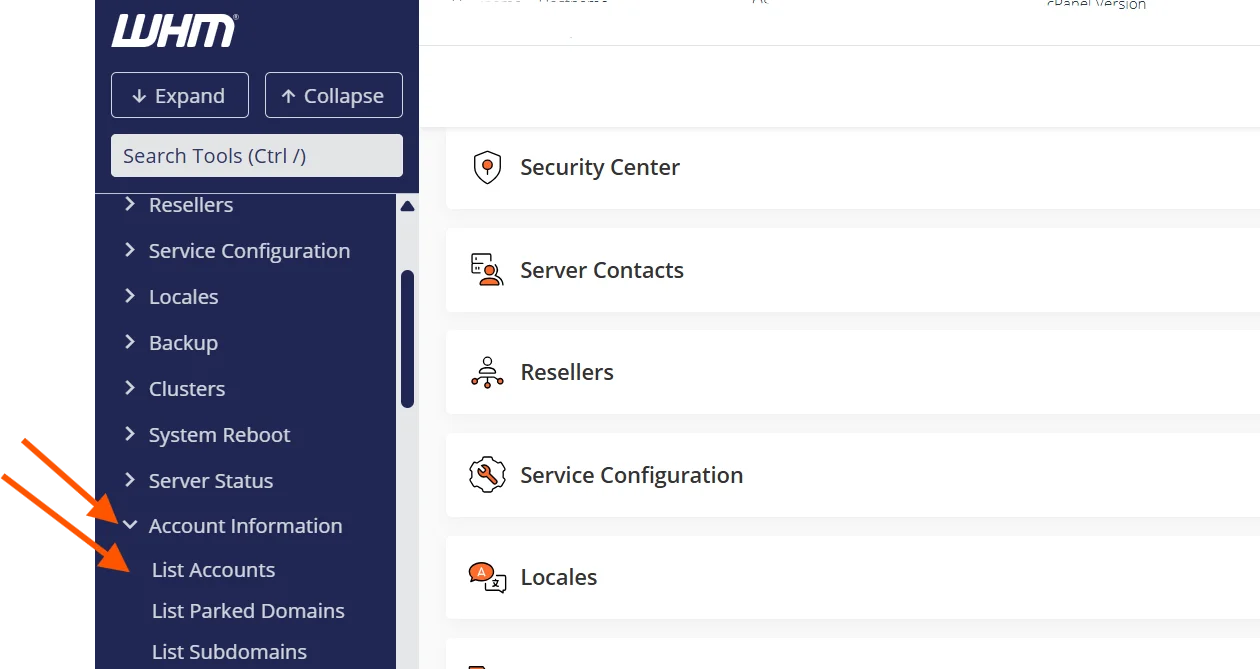
This will give you a searchable, sortable overview of every account on your server.
This includes domain names, usernames, packages, IP addresses, and account creation dates.
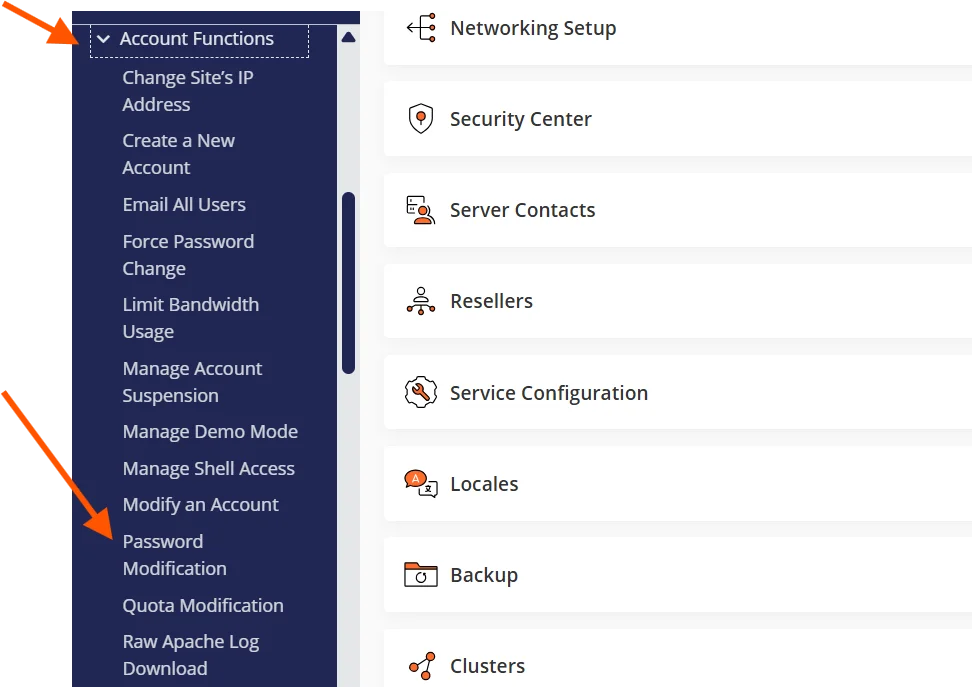
Modifying an Account
Need to change a client’s resource limits, switch their package, or update their contact email?
Go to Account Functions, then Modify an Account. This lets you adjust individual settings without deleting and recreating the account.
Change Password
Clients forget passwords constantly.
Under Account Functions → Password Modification, you can reset any client’s cPanel password in seconds.
Always notify the client when you make this change.
Suspend or Unsuspend an Account
If a client hasn’t paid or violates your terms of service, you can suspend their account.
- In WHM, go to Account Functions → Manage Account Suspension.
- Select the account you want to suspend from the dropdown list.
- Enter a reason for the suspension in the Reason field. This is optional but recommended for your own records.
- Click Suspend. The account will be immediately locked, and the client’s website will display a default suspension page.
When the issue is resolved, you can unsuspend with a single click.
Just go back to the same Manage Account Suspension page, select the account, and click Unsuspend.
No data is lost.
When the issue is resolved, unsuspend with a single click. No data is lost.
Terminate an Account
Terminating an account permanently deletes all files, databases, emails, and configurations associated with it.
Always confirm with the client and create a backup before proceeding. WHM will also ask you to confirm termination to prevent accidental deletion.
To do this:
- Navigate to Account Functions → Terminate an Account (for a single account) or Account Functions → Terminate Accounts to remove multiple accounts simultaneously.
- Select the account(s) you want to terminate from the list.
- Optionally, check the box to Remove the DNS zone if you want to clean up all DNS records associated with the domain.
- Enter the domain name or confirm your selection to prevent accidental deletion.
- Click Terminate.
Keeping Tabs on Account Performance
When a website goes down or loads slowly because it’s hit a resource limit, the client doesn’t blame the server; they blame you.
Staying ahead of usage trends means fewer emergency emails, fewer angry clients, and a hosting business that runs smoothly.
How to View Account Usage
WHM provides detailed usage statistics for every account on your server.
To access this, navigate to Account Information → List Accounts and click on any individual account to see its resource consumption.
You can also use Server Status → Server Information for a broader, server-wide overview of resource usage across all accounts.
From these dashboards, you’ll be able to monitor several key metrics.
Here’s what to pay attention to:
- Disk Space Usage – Shows how much storage each account is consuming for website files, emails, and databases. Accounts consistently above 80% usage are at risk of running out.
- Bandwidth Consumption – Tracks how much data transfer each account uses per month. Sudden spikes can indicate a traffic surge, a bot attack, or large file downloads.
- Email Account and Database Counts – Tells you whether a client is approaching the maximum number of email addresses or databases allowed under their package.
- Resource-Heavy Accounts – Identify which accounts are using the most resources across your server. A single account consuming a disproportionate share of bandwidth or disk space can affect performance for everyone else.
Make it a habit to review these metrics consistently. Catching an account at 90% disk usage before it hits 100% is far easier than dealing with a crashed site after the fact.
If your monitoring shows a client is consistently hitting their bandwidth cap or running low on disk space, that’s the perfect time to reach out and suggest an upgrade.
You’re not pushing a sale; you’re solving a problem they might not even know they have yet.
Need more room to grow? Truehost’s reseller hosting plans offer generous account limits, disk space, and bandwidth. This makes sure you’re never forced to turn away new clients because you’ve maxed out your resources.
How to Upgrade or Downgrade Packages
When a client outgrows their current plan or needs to scale back, changing their package in WHM is straightforward:
- Go to Account Functions → Upgrade/Downgrade an Account.
- Select the client’s account from the list.
- Choose the new package you want to assign from the available options.
- Review the resource changes and click Upgrade/Downgrade.
The resource limits update immediately with no downtime for the client.
Conclusion
Creating and managing client accounts in WHM seems intimidating at first, but it becomes second nature fast.
The key steps are simple:
a) Set up your packages
b) Create accounts using those packages
c) Use WHM’s built-in tools to monitor, modify, and manage those accounts over time.
Ready to start your reseller hosting business? Truehost gives you everything you need: reliable servers, full WHM access, affordable pricing, and the scalability to grow alongside your client base.
Try us and turn your hosting knowledge into a real business.